

How To Draw A Bear Face Step By Step Easy
Do you think drawing a bear is hard? In this tutorial, you'll learn how to draw a Grizzly bear in an easy step-by-step way.
You'll be a master at drawing bears after following these 12 simple steps.
Let's get started!
Drawing Supplies Needed
You can use any drawing supplies to draw a bear, but here are the best tools for drawing.
Step 1
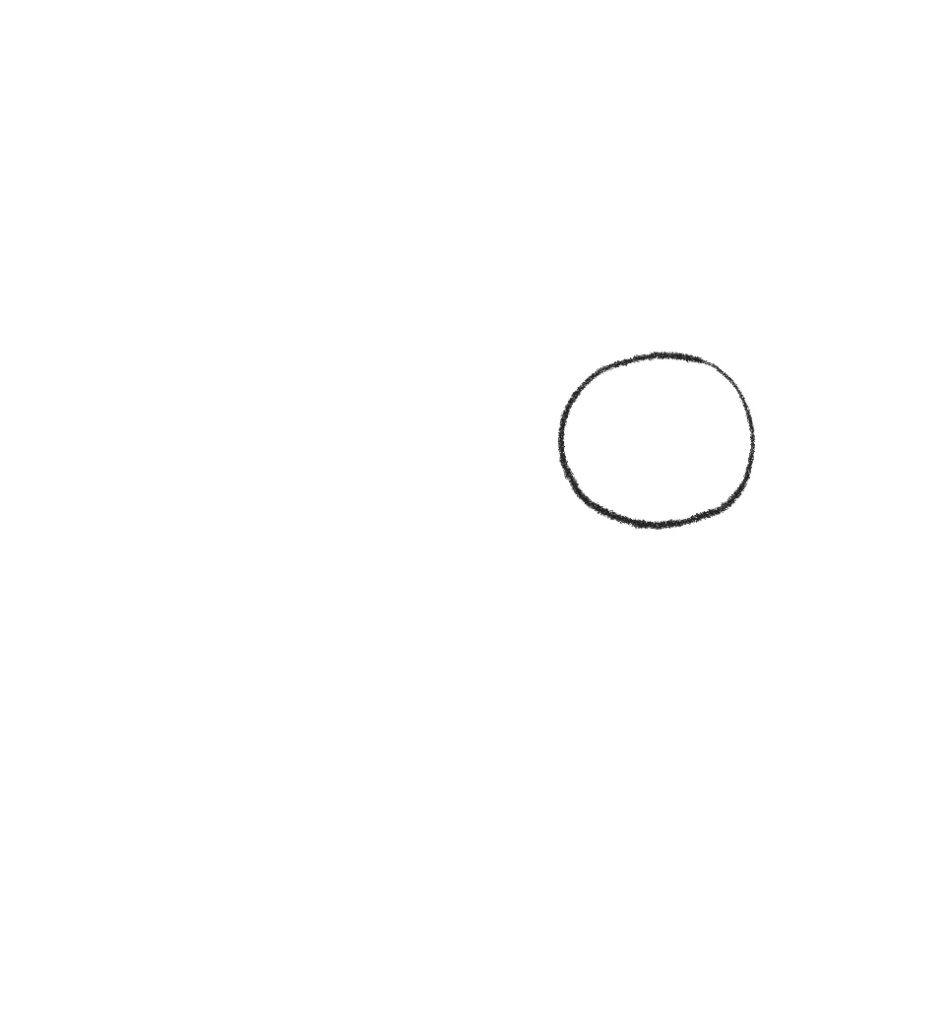
Start with a circle.
Step 2

At the bottom of the circle make a U shape extending a little bit into the circle.
Step 3

From the top of the circle make a mountain-shaped line with two peaks, the furthest peak from the circle should extend down to the bottom of the page.
Step 4
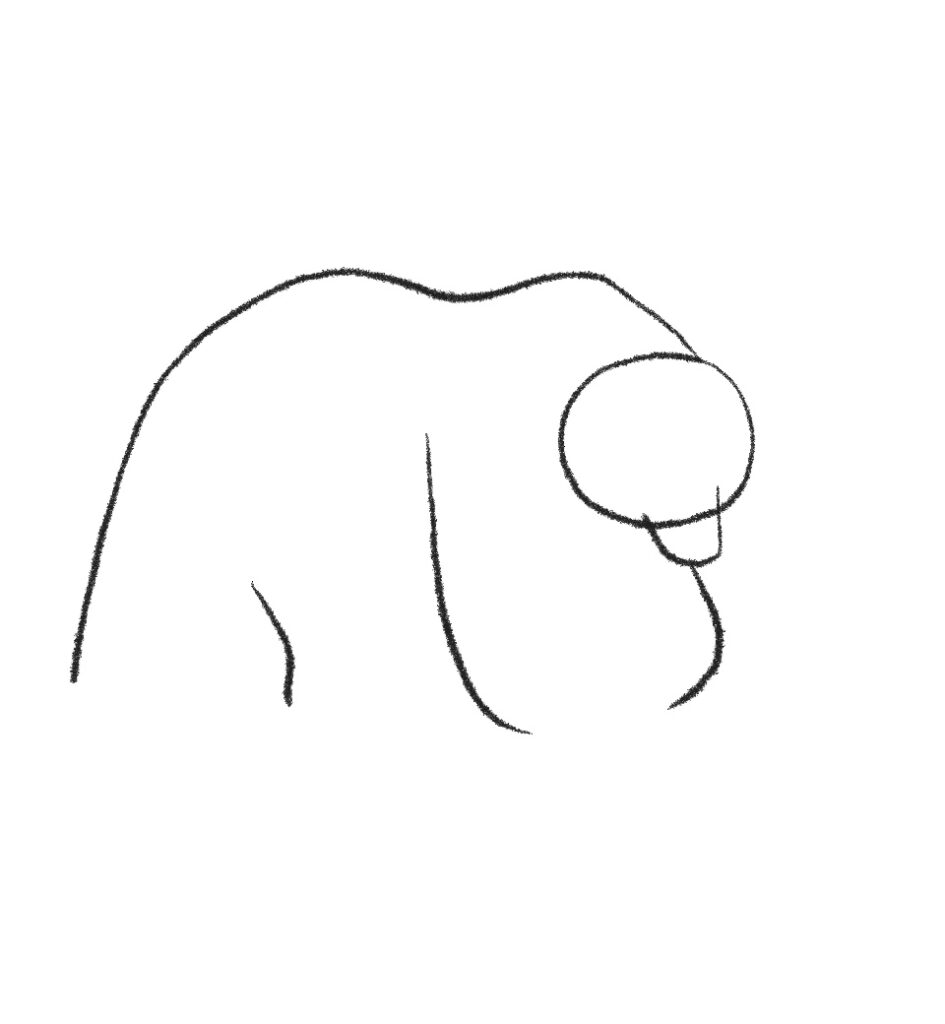
Now create leg guidelines! Below the U shape at the front make a small J-shaped line. Now, a bit to the left of that leaving a large gap makes a curved lowercase "L" line. Finally at the back just a very short bent line. These are the guidelines for our bear's legs.
Step 5

Now on the circle, we're going to use a technique we haven't yet: Face guidelines. These lines across in a curve and down in a curve help us mark out the eyes and forehead shape!
At the same time create a curved line to close the gap between the two inner leg guidelines.
Step 6

On the left of our forehead line, we'll make a soft triangle shape, and mimic that on the outside of the top of the circle for our ears.
Step 7

Time to make these legs take shape! Under the head to the left of the snout, we'll make a line that is wider at the top and curved inwards as it extends down. From that line, right under the widest part, create a curved line going towards the peak of the "J" shaped line under the snout.
At the back of the belly line we made in the previous step, extend it downwards going further inward as you go for the hind leg. Finally, a short line across the remaining leg guideline will round out the four legs.
Step 8
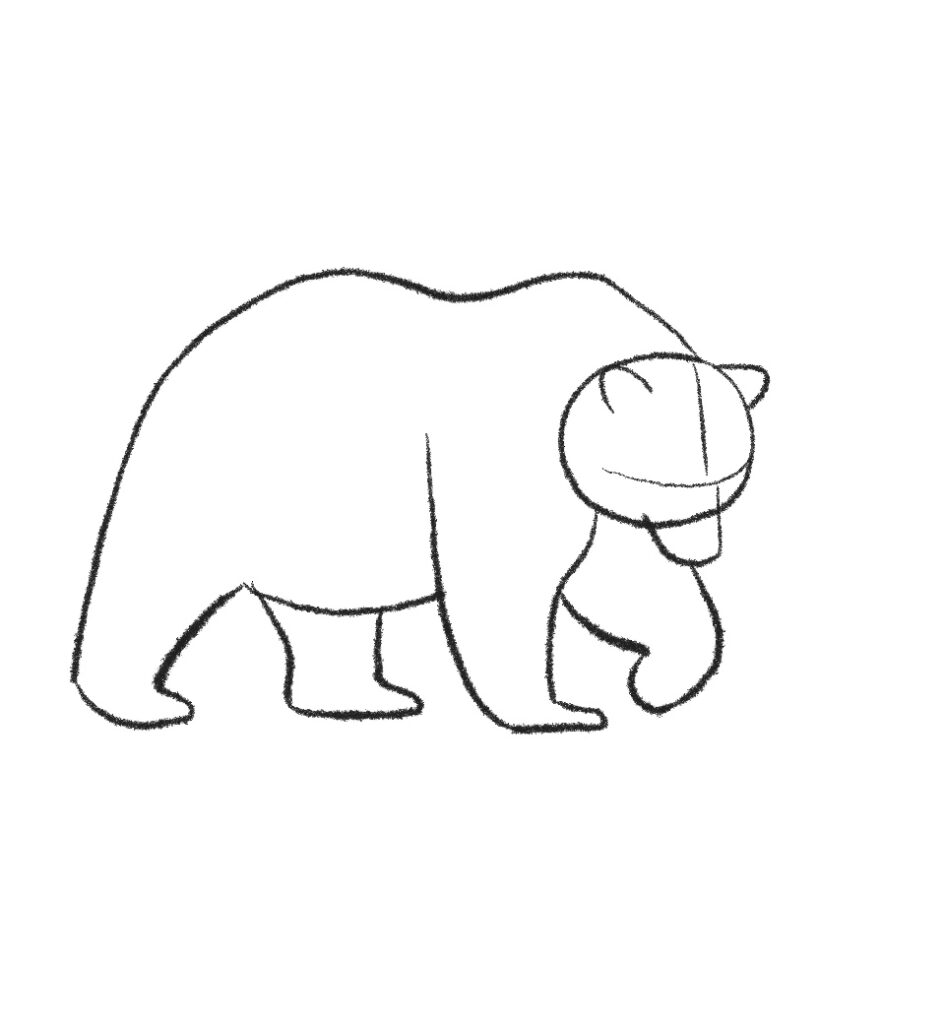
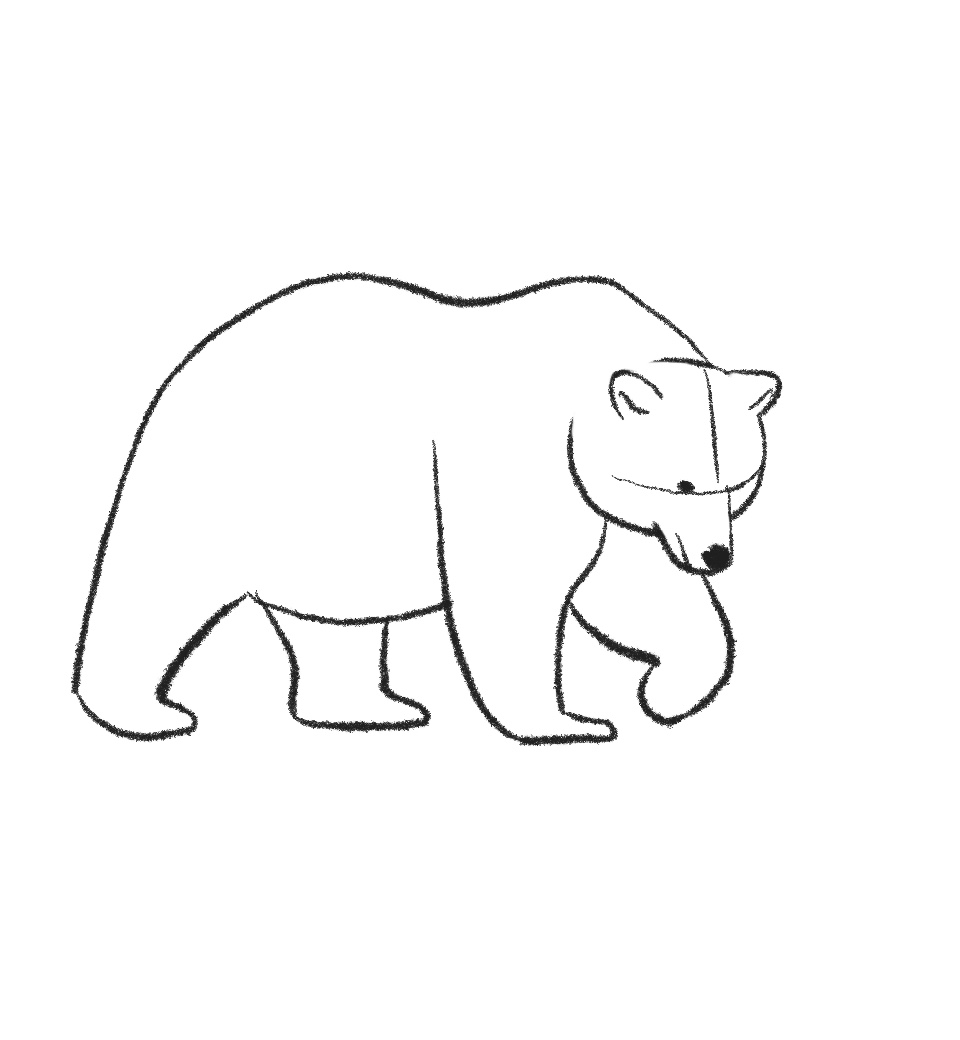
Time for feet! Connect the leg lines together with a rounded line thinking of how Grizzly bears have toes and claws!
Step 9

Now, erase some of the head circle and overlapping lines with the snout.
Step 10

Let's start fleshing out the face! at the right corner of the snout make a black circle with a little missing as if someone took a bite out of it. Then, under that leaving some space first, make a small line going inwards towards the head.
Along the curved horizontal line make a black dot for the eye.
Now, mark out the inside of the ears!
Step 11

Add the second eye where the horizontal line meets the snout and then erase the face guides. On the back of three of the legs add small lines for fur!
Step 12

Now here is where the bear takes shape! Fill the bear with a medium shade color, I used a medium grey here. Then, make out the shadows with a slightly darker lighter pressure brush.
I put these darker patches under the chin where the shadow would fall on the front leg, behind the head, in the dip in the back, the back leg, where the legs meet the body, and around the eyes.
NOW here's the trick to making fur. Take either a smaller-sized brush if you're working digitally, or if you're working with paper and pencil sharpen your pencil to a fine point. Making fur is time-consuming so you'll need to have patience!
Start making small lines in the direction of the body movement then do another layer with more pressure. You want to make sure you have dark lines and light lines and have them vary. Then, finish off with a color lighter than all the other lines for the highlighted strands!
This will take a lot of time so don't rush, and have fun with it. Use whatever colors you want, you can use browns if you want to go straight into color or stay with black and white if you prefer.
Once you have the fur looking like you wish, erase the thicker fur lines we made in the previous step if you're working digitally, or just thin them out with a highlighted color if non-digital.
Make the bottom of the feet a solid dark color and add a highlight to the nearest eye to the viewer, and lighten the end of the snout.
Most of the work for animals really comes from the shading so use this time to experiment!
Other topics to help you draw animals:
- How to Draw a Dragon (Step by Step with Pictures)
- How to Draw a Fox (Step by Step with Pictures)
- Draw a Realistic Elephant (5 Easy Steps)
- How to Draw a Realistic Dinosaur (5 Step by Step Pictures)
- How to Draw Dogs – Easy Step by Step Tutorial for Cute Dogs
Thank you Carolyn for this amazing step-by-step process. You can view her social @ClazDesign if you enjoyed her illustrations. Check out her shop where she has amazing illustrations.

Active Time 20 minutes
Total Time 20 minutes
Difficulty Easy
Estimated Cost $0
Materials
- Pencil
- Paper
- Or tablet and stylus
Tools
- Pencil
- Paper
- Or tablet and stylus
Instructions
- Step 1
Start with a circle.
- Step 2
At the bottom of the circle make a U shape extending a little bit into the circle.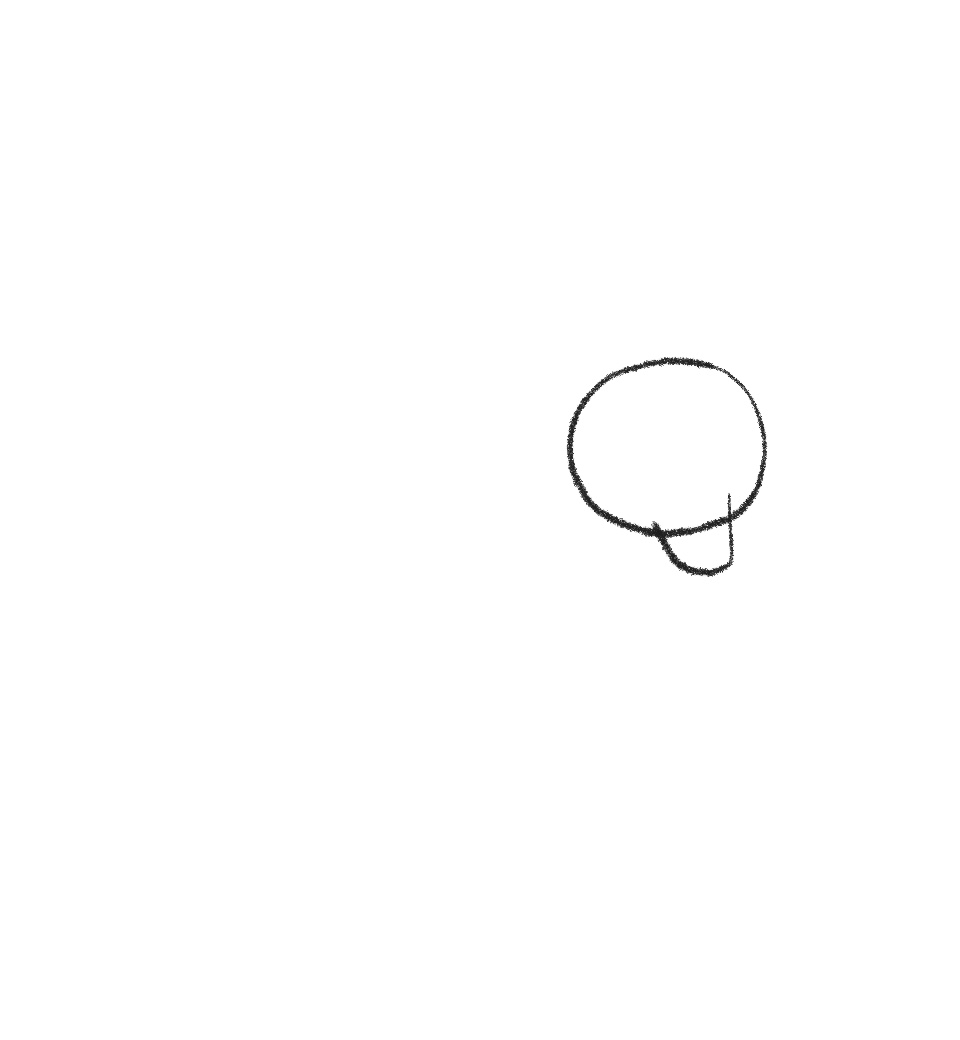
- Step 3
From the top of the circle make a mountain-shaped line with two peaks, the furthest peak from the circle should extend down to the bottom of the page.
- Step 4
Now create leg guidelines! Below the U shape at the front make a small J-shaped line. Now, a bit to the left of that leaving a large gap makes a curved lowercase "L" line. Finally at the back just a very short bent line. These are the guidelines for our bear's legs.
- Step 5
Now on the circle, we're going to use a technique we haven't yet: Face guidelines. These lines across in a curve and down in a curve help us mark out the eyes and forehead shape!
At the same time create a curved line to close the gap between the two inner leg guidelines.
- Step 6
On the left of our forehead line, we'll make a soft triangle shape, and mimic that on the outside of the top of the circle for our ears.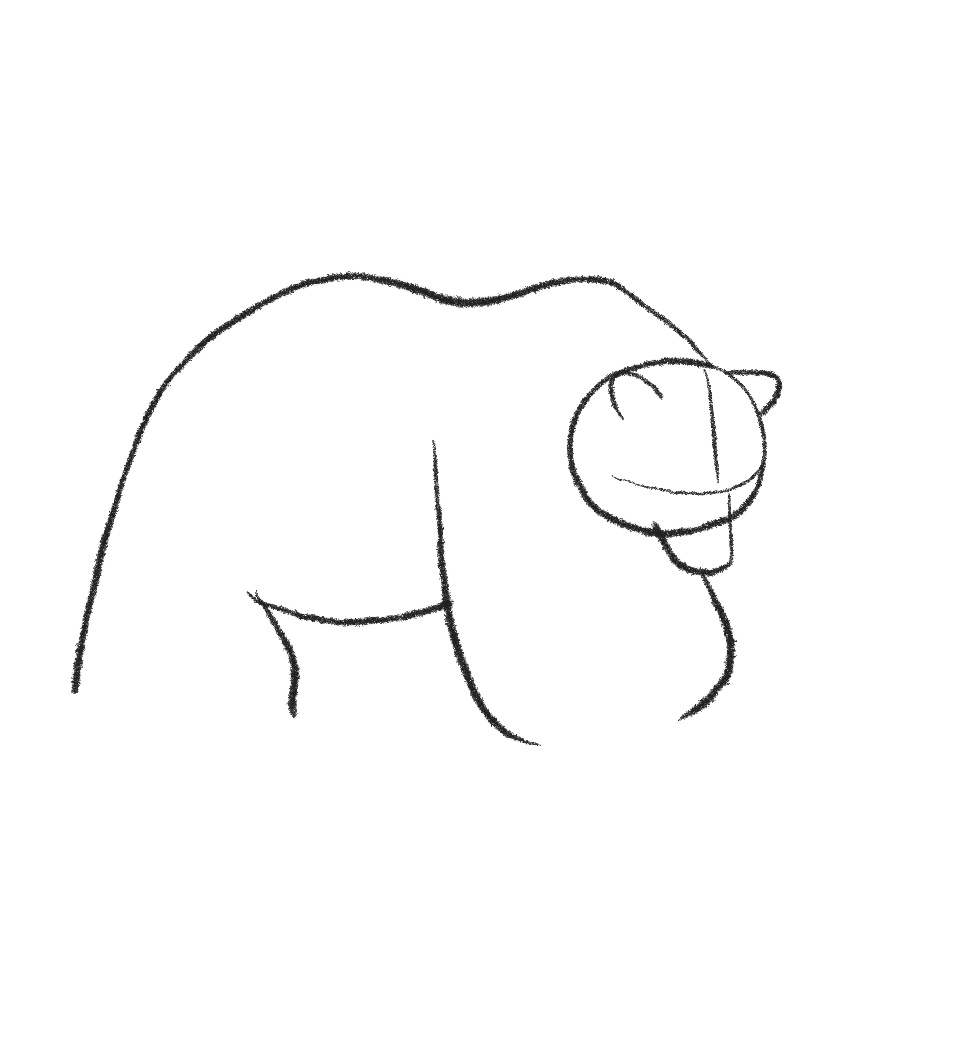
- Step 7
Time to make these legs take shape! Under the head to the left of the snout, we'll make a line that is wider at the top and curved inwards as it extends down. From that line, right under the widest part, create a curved line going towards the peak of the "J" shaped line under the snout.At the back of the belly line we made in the previous step, extend it downwards going further inward as you go for the hind leg. Finally, a short line across the remaining leg guideline will round out the four legs.

- Step 8
Time for feet! Connect the leg lines together with a rounded line thinking of how Grizzly bears have toes and claws!
- Step 9
Now, erase some of the head circle and overlapping lines with the snout.
- Step 10
Let's start fleshing out the face! at the right corner of the snout make a black circle with a little missing as if someone took a bite out of it. Then, under that leaving some space first, make a small line going inwards towards the head.Along the curved horizontal line make a black dot for the eye.
Now, mark out the inside of the ears!
- Step11
Add the second eye where the horizontal line meets the snout and then erase the face guides. On the back of three of the legs add small lines for fur!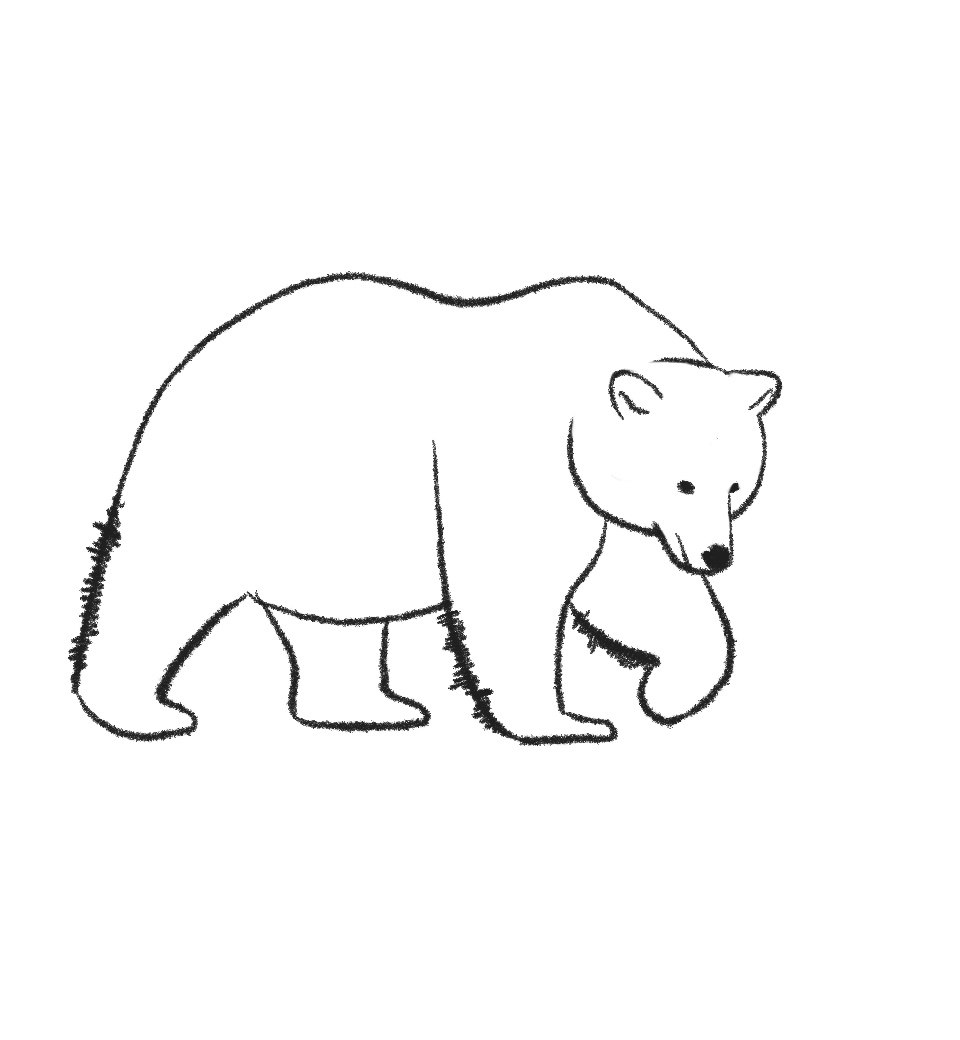
- Step 12
Now here is where the bear takes shape! Fill the bear with a medium shade color, I used a medium grey here. Then, make out the shadows with a slightly darker lighter pressure brush.I put these darker patches under the chin where the shadow would fall on the front leg, behind the head, in the dip in the back, the back leg, where the legs meet the body, and around the eyes.
NOW here's the trick to making fur. Take either a smaller-sized brush if you're working digitally, or if you're working with paper and pencil sharpen your pencil to a fine point. Making fur is time-consuming so you'll need to have patience!
Start making small lines in the direction of the body movement then do another layer with more pressure. You want to make sure you have dark lines and light lines and have them vary. Then, finish off with a color lighter than all the other lines for the highlighted strands!
This will take a lot of time so don't rush, and have fun with it. Use whatever colors you want, you can use browns if you want to go straight into color or stay with black and white if you prefer.
Once you have the fur looking like you wish, erase the thicker fur lines we made in the previous step if you're working digitally, or just thin them out with a highlighted color if non-digital.
Make the bottom of the feet a solid dark color and add a highlight to the nearest eye to the viewer, and lighten the end of the snout.
Most of the work for animals really comes from the shading so use this time to experiment!

How To Draw A Bear Face Step By Step Easy
Source: https://jaejohns.com/how-to-draw-a-grizzly-bear/
Posted by: osbywaye1974.blogspot.com
0 Response to "How To Draw A Bear Face Step By Step Easy"
Post a Comment